不写一遍总是记不住——Vue数据双向绑定
数据双向绑定,作为三大前端框架的重要特性,总是被人们津津乐道(尤其是面试官),defineProperty 啦,proxy 啦,digest 循环检查啦(AngularJS)……数据绑定的相关文章看了很多,但总是感觉差点意思,还是自己亲自实现一个数据绑定吧
注:本文主要观点与思路学习了 前端攻城狮-vue 的双向绑定原理及实现
Object.defineProperty 方式
Object.defineProperty 是 Vue 2.X 的实现方式,其原理就是在 Vue 实例中定义 data 时: ①Vue 遍历 data 中所有数据, ② 通过 ES5 的 Object.defineProperty 重写 data 中的每一项数据的 set 属性 ③ 一旦监听器发现数据发生改变,(如果是 view 层的数据改变时通过事件监听的,vm 层是数据赋值的方法)就会触发 set 函数 ④set 函数中包含了重新渲染 view 页面的方法,一旦触发 set 就可以重新渲染页面。
流程就是这样一个流程,但是在代码层面需要为此实现一些必要的功能:
- 实现一个监听器 Observer,用来劫持并且监听所有属性。
- 实现一个订阅者 Wathcer,收到 Observer 传来的变化通知,执行相应函数来更新 View 页面.(为了统一管理 Watcher,我们还会实现一个 Dep——订阅器)
- 实现一个解析器 Compile,可以扫描 View 中每个节点上的相关指令(如 v-model)从而初始化 watcher 和模板数据。
0.最终效果演示
1.实现一个 Observer
Observer 是一个数据监听器,其实现的核心方法就是 Object.defineProperty() 如果要对所有属性都进行监听的话,可以通过递归来遍历所有属性。
function obverve(data) {
  if (!data || typeof data !== "object") {
    return;
  }
  Object.keys(data).forEach((key) => {
    difineReactive(data, key, data[key]);
  });
}

function difineReactive(data, key, val) {
  obverve(val); //通过递归遍历所有子属性
  Object.defineProperty(data, key, {
    enumerable: true,
    configurable: true,
    get: function () {
      return val;
    },
    set: function (newVal) {
      val = newVal;
      console.log(
        "属性" + key + '已加入监听器,现在值为:"' + newVal.toString() + '"',
      );
    },
  });
}
上述代码定义了一个监听器,这个监听器遍历传入的对象的每一项属性,为其执行一个 defineReactive 方法,defineReactive 方法调用 es5 自带的 Object.defineProperty(),为其添加 get 和 set 属性. 让我们来测试一下:
console.log(demo);
// { data1: [Getter/Setter], data2: [Getter/Setter] }     已经为属性增加了getter与setter
demo.data1.name = "haha";
//属性name已加入监听器,现在值为:"haha"
//'haha'
demo.data2 = "test";
//属性data2已加入监听器,现在值为:"test"
//'test'
2.实现一个 Dep 与 Watcher
此时,我们定义的所有数据已经加入了监听,接下来我们需要实现一个 Dep——订阅器,用来统一收集与管理订阅者.当属性变化时由它来通知所有的订阅者.显然,Dep 应该是一个容器,我们就用 List 来实现吧. 为了代码展示方便,我们新建一个 Watcher 文件,来存放 Dep 与 Wathcer 的代码
function Dep() {
  this.subs = [];
}

Dep.prototype = {
  addSub: function (sub) {
    this.subs.push(sub);
  },
  notify: function () {
    this.subs.forEach((sub) => {
      sub.update();
    });
  },
};
相应的,为了将监听器与订阅器连接起来,我们在需要在监听器中调用订阅器,将监听器的代码修改如下:
function difineReactive(data, key, val) {
  obverve(val); //遍历所有子属性
  var dep = new Dep();
  Object.defineProperty(data, key, {
    enumerable: true,
    configurable: true,
    get: function () {
      if (是否需要添加Watcher) {
        dep.addSub(watcher); //添加订阅者
      }
      return val;
    },
    set: function (newVal) {
      val = newVal;
      console.log(
        "属性" + key + '已加入监听器,现在值为:"' + newVal.toString() + '"',
      );
      dep.notify(); //数据变化,通知所有订阅者
    },
  });
}
这样,每次更新数据时,Set 属性就会让 Dep 就会通知所有的 Watcher.为了让 Wathcer 能够正常初始化,我们在 Get 属性中增加了初始化 Watcher 的功能,但很明显,总不能每次 get 都初始化一个 Watcher 吧,所有我们增加了条件判断来确定是否需要初始化 Watcher.
接下来我们来实现 Watcher, Watcher 的代码写在 Watcher 文件中即可
function Wathcher(myVM, exp, cb) {
  this.cb = cb;
  this.vm = myVM;
  this.exp = exp;
  this.value = this.get(); //将自己添加到订阅器
}

Wathcher.prototype = {
  update: function () {
    this.run();
  },
  run: function () {
    var value = this.vm.data[this.exp];
    var oldVal = this.value;
    if (value !== oldVal) {
      this.value = value;
      this.cb.call(this.vm, value, cb);
    }
  },
  get: function () {
    Dep.target = this; //将Watcher自身存入到target中缓存
    var value = this.vm.data[this.exp]; //执行监听器中get函数
    Dep.target = null; //释放自己
    return value;
  },
};
这里的代码有一些抽象,需要我们仔细说一下:
- Watcher 中传入三个值:
- vm : 在代码执行环节会调用我们创建的 vm 实例(在本文中我们将会自己建一个简易的 vm);
- exp : data 中需要订阅者响应的数据(模板数据,在我们定义好解析器之前,暂时这个属性还未生效)
- cb : 回调函数,通常我们会在里面写入数据变化后在 view 中渲染页面的代码
Watcher 是如何运行的呢? Watcher 初始化时去获取 Observer 中相应的值 → Observer 在 Get 中定义了添加 Watcher 的操作 → Wacher 初始化时同时也将自己添加到 Dep 中 前面我们提到,Observer 不可能每一次出发 get 就要添加一个 Watcher,所以增加了条件判断.我们使用一个缓存 target 来临时存放订阅者,添加成功后去掉即可.
我们改造 Observer 如下:
function obverve(data) {
  if (!data || typeof data !== "object") {
    return;
  }
  Object.keys(data).forEach((key) => {
    difineReactive(data, key, data[key]);
  });
}

function difineReactive(data, key, val) {
  obverve(val); //遍历所有子属性
  var dep = new Dep();
  Object.defineProperty(data, key, {
    enumerable: true,
    configurable: true,
    get: function () {
      if (Dep.target) {
        dep.addSub(watcher); //添加订阅者
      }
      return val;
    },
    set: function (newVal) {
      if (val === newVal) {
        return;
      }
      val = newVal;
      console.log(
        "属性" + key + '已加入监听器,现在值为:"' + newVal.toString() + '"',
      );
      dep.notify(); //数据变化,通知所有订阅者
    },
  });
}
然后在 Watcher 中为 Dep 增加一个属性
Dep.target = null;OK! 现在一个简单的 Observer 和 Watcher(Dep) 已经构建完成了,我们只需要将他们关联起来即可. 这里我们还没有设计解析器 Compile,所以还不能向 Vue 一样直接填入模板数据,我们咋们是暂时用一个写死模板数据来代替吧.
新建一个 Index.js 代码如下
function MyVue(data, el, exp) {
  this.data = data;
  obverve(data);
  el.innerHTML = this.data[exp];
  new Wathcher(this, exp, function (value) {
    el.innerHTML = value;
  });
  return this;
}
在 View 层中调用
<!doctype html>
<html lang="en">
  <head>
    <meta charset="UTF-8" />
    <meta name="viewport" content="width=device-width, initial-scale=1.0" />
    <title>我的数据双向绑定系统</title>
  </head>
  <body>
    <h1 id="name">{{name}}</h1>
  </body>
  <script src="js/Index.js"></script>
  <script src="js/Watcher.js"></script>
  <script src="js/Observer.js"></script>
  <script>
    var ele = document.querySelector("#name");
    var myVue = new MyVue(
      {
        name: "hello world",
      },
      ele,
      "name",
    );

    console.log("当前的name:" + myVue.name);

    window.setTimeout(() => {
      console.log("2000毫秒后,name值改变了");
      myVue.data.name = "hello me!";
    }, 2000);
  </script>
</html>
这样我们就新建了一个自己的 Vue 实例,在新建实例时传入数据,Observer 遍历传入的数据,为其绑定 Set 和 Get 方法,之后为我们指定的 exp 属性建立 Watcher 来监听 Observer 传过来的数据变化消息.
截止现在,我们已经成功了一大半

这里我们再添加一个细节处理,我们修改 data 中数据需要通过这样的代码
myVue.data.name = 'XXXXX'但我们希望赋值代码是这样的
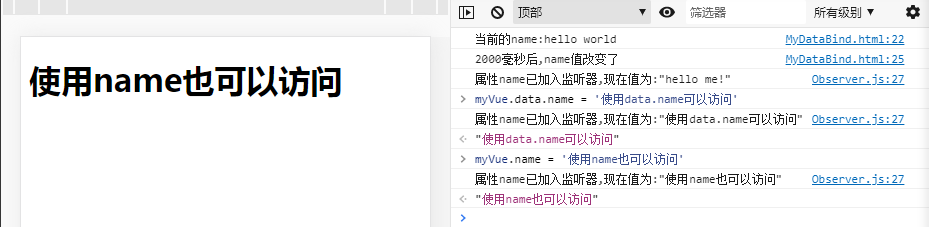
myVue.name = 'XXXXX'为了实现这样的效果,我们需要对 myVue 再做一个处理处理,将访问 myVue 属性代理为 myVue.data.其实现原理也是通过 Object.defineProtperty();
“
让我们看一看效果:
注: 你可以点击这里获取源代码 传送门
你也可以访问这个仓库,这个仓库将数据绑定的实现过程用不同版本代码展现出来了 传送门
3.实现 Compile
我们已经实现了数据的双向绑定. 但是对于 View 层的渲染,我们采用的是这样的方式
<h1 id="name">{{name}}</h1>var ele = document.querySelector("#name");
el.innerHTML = value;这就导致我们定义的数据必须指定一个写死的 el(元素)来展示数据. 而 Vue 中这种数据是这样实现的:
<h1>{{name}}</h1>//js里根本不用写代码Vue 这种数据同步的方式就是模板,为了实现模板语法,我们需要去实现一个解析器. 解析器解析 dom 节点,实现元素与数据的绑定.
解析器工作有两个步骤:
- 解析模板指令,将其替换为模板数据,初始化 View 层
- 将模板指令对应的节点绑定对应的更新函数,初始化相关的订阅器
首先定义一个解析器
function Compile(el, vm) {
  this.vm = vm;
  this.el = document.querySelector(el);
  this.fragment = null;
  this.init();
}
为了解析模板首先需要获取 dom 元素,然后对 dom 元素上含有指令的节点进行处理. 因为这个环节需要对 dom 进行频繁操作,所以可以先建立一个 fragment 片段,将需要解析的节点存入 fragment 片段中:
function nodeToFragment(el) {
  var fragment = document.createDocumentFragment();
  var child = el.firstChild;
  while (child) {
    //将Dom元素移入frament中
    fragment.appendChild(child);
    child = el.firstChild;
  }
  return fragment;
}
接下来需要遍历每一个节点,将含有指令的节点进行处理. 我们先只考虑 ‘{{值}}’ 这种情况:
function Compile(el, vm) {
  this.vm = vm;
  this.el = document.querySelector(el);
  this.fragment = null;
  this.init();
}

Compile.prototype = {
  init() {
    if (this.el) {
      this.fragment = this.nodeToFragment(this.el);
      this.compileElement(this.fragment);
      this.el.appendChild(this.fragment);
    } else {
      console.log("Dom元素不存在");
    }
  },
  nodeToFragment(el) {
    var fragment = document.createDocumentFragment();
    var child = el.firstChild;
    while (child) {
      //将Dom元素移入frament中
      fragment.appendChild(child);
      child = el.firstChild;
    }
    return fragment;
  },

  compileElement(el) {
    var childNodes = el.childNodes;
    var my = this;
    [].slice.call(childNodes).forEach((node) => {
      var reg = /\{\{(.*)\}\}/;
      var text = node.textContent;

      if (my.isTextNode(node) && reg.test(text)) {
        //判断是符合{{}}的指令
        my.compileText(node, reg.exec(text)[1]);
      }

      if (node.childNodes && node.childNodes.length) {
        my.compileElement(node); //继续递归遍历子节点
      }
    });
  },

  compileText(node, exp) {
    var my = this;
    var initText = this.vm[exp];
    this.updateText(node, initText); //将初始化的数据初始化到视图中
    new Watcher(this.vm, exp, function (value) {
      my.updateText(node, value);
    });
  },

  updateText(node, value) {
    node.textContent = typeof value == "undefined" ? "" : value;
  },
  isTextNode: function (node) {
    return node.nodeType == 3;
  },
};
这个时候我们将 index 中的代码稍作修改,去掉手动添加 Watcher 的操作,让解析器自己在 id=app 的 div 中遍历递归查找所有’{{值}}’ 的模板指令吧。
//index.js
function MyVue(options) {
  var my = this;
  this.vm = this;
  this.data = options.data;

  Object.keys(this.data).forEach(function (key) {
    my.proxyKeys(key); //绑定代理属性
  });

  obverve(this.data);
  // el.innerHTML = this.data[exp];
  // new Wathcher(this,exp,function(value){
  //     el.innerHTML = value;
  // })
  new Compile(options.el, this.vm);
  return this;
}

MyVue.prototype = {
  proxyKeys(key) {
    var my = this;
    Object.defineProperty(this, key, {
      enumerable: false,
      configurable: true,
      get: function proxyGetter() {
        return my.data[key];
      },
      set: function proxySetter(newVal) {
        my.data[key] = newVal;
      },
    });
  },
};
html 也要做相应的修改(有 Vue 的味道了)
<!doctype html>
<html lang="en">
  <head>
    <meta charset="UTF-8" />
    <meta name="viewport" content="width=device-width, initial-scale=1.0" />
    <title>我的数据双向绑定系统</title>
  </head>

  <body>
    <div id="app">
      <h2>{{title}}</h2>
      <h1>{{name}}</h1>
    </div>
  </body>
  <script src="js/Watcher.js"></script>
  <script src="js/Observer.js"></script>
  <script src="js/Compile.js"></script>
  <script src="js/Index.js"></script>
  <script>
    var myVue = new MyVue({
      el: "#app",
      data: {
        title: "Compile is Working!",
        name: "",
      },
    });

    console.log("当前的name:" + myVue.name);

    window.setTimeout(() => {
      console.log("2000毫秒后,name值改变了");
      myVue.title = "hello me!";
    }, 2000);
  </script>
</html>
到这里,我们就会发现以前 vue 的一些设定的来源,譬如为什么 vue 的 html 需要包裹在一个 div 中,譬如什么声明 vue 实例时会有一个 el = ‘#app’ 。
接下来我们完善解析器,使其能够判断更多的指令. (例如: v- on: 等指令);
首先将 compile 的 compileElement 方法进行改造
  compileElement(el) {
    var childNodes = el.childNodes;
    var my = this;
    [].slice.call(childNodes).forEach(node => {
      var reg = /\{\{(.*)\}\}/;
      var text = node.textContent;  //获取node中内容

      if(my.isElementNode(node)){  //如果是node属性中的指令
        self.compile(node); //node属性指令调用compile来解析
      }
      else if (my.isTextNode(node) && reg.test(text)) {  //如果是模板指令
        //判断是符合{{}}的指令
        my.compileText(node, reg.exec(text)[1]);
      }

      if (node.childNodes && node.childNodes.length) {
        my.compileElement(node); //继续递归遍历子节点
      }
    });
  }

  //判断是否是node属性中的指令
    isElementNode:function(node){
    return node.nodeType == 1;
  }
接下来我们来编写 compile 方法,使其可以解析不同指令. 这部分就不详细说明了, 直接看一下代码.
function Compile(el, vm) {
  this.vm = vm;
  this.el = document.querySelector(el);
  this.fragment = null;
  this.init();
}

Compile.prototype = {
  init() {
    if (this.el) {
      this.fragment = this.nodeToFragment(this.el);
      this.compileElement(this.fragment);
      this.el.appendChild(this.fragment);
    } else {
      console.log("Dom元素不存在");
    }
  },
  nodeToFragment(el) {
    var fragment = document.createDocumentFragment();
    var child = el.firstChild;
    while (child) {
      //将Dom元素移入frament中
      fragment.appendChild(child);
      child = el.firstChild;
    }
    return fragment;
  },

  compileElement(el) {
    var childNodes = el.childNodes;
    var my = this;
    [].slice.call(childNodes).forEach((node) => {
      var reg = /\{\{(.*)\}\}/;
      var text = node.textContent; //获取node中内容

      if (my.isElementNode(node)) {
        //如果是node属性中的指令
        my.compile(node); //node属性指令调用compile来解析
      } else if (my.isTextNode(node) && reg.test(text)) {
        //如果是模板指令
        //判断是符合{{}}的指令
        my.compileText(node, reg.exec(text)[1]);
      }

      if (node.childNodes && node.childNodes.length) {
        my.compileElement(node); //继续递归遍历子节点
      }
    });
  },
  compile(node) {
    var nodeAttrs = node.attributes;
    var my = this;
    Array.prototype.forEach.call(nodeAttrs, (attr) => {
      var attrName = attr.name;
      if (my.isDirective(attrName)) {
        var exp = attr.value;
        var dir = attrName.substring(2);
        if (my.isEventDirective(dir)) {
          //事件指令
          my.compileEvent(node, my.vm, exp, dir);
        } else {
          //v-mode 指令
          my.compileModel(node, my.vm, exp, dir);
        }
        node.removeAttribute(attrName);
      }
    });
  },
  compileText(node, exp) {
    var my = this;
    var initText = this.vm[exp];
    my.updateText(node, initText); //将初始化的数据初始化到视图中
    new Watcher(this.vm, exp, function (value) {
      my.updateText(node, value);
    });
  },
  compileEvent: function (node, vm, exp, dir) {
    var eventType = dir.split(":")[1];
    var cb = vm.methods && vm.methods[exp];

    if (eventType && cb) {
      node.addEventListener(eventType, cb.bind(vm), false);
    }
  },
  compileModel: function (node, vm, exp, dir) {
    var my = this;
    var val = this.vm[exp];
    this.modelUpdater(node, val);
    new Watcher(this.vm, exp, function (value) {
      my.modelUpdater(node, value);
    });

    node.addEventListener("input", function (e) {
      var newValue = e.target.value;
      if (val === newValue) {
        return;
      }
      my.vm[exp] = newValue;
      val = newValue;
    });
  },
  modelUpdater: function (node, value, oldValue) {
    node.value = typeof value == "undefined" ? "" : value;
  },
  //是否为v-model指令
  isDirective: function (attr) {
    return attr.indexOf("v-") == 0;
  },
  //是否为事件指令
  isEventDirective: function (dir) {
    return dir.indexOf("on:") === 0;
  },

  updateText(node, value) {
    node.textContent = typeof value == "undefined" ? "" : value;
  },
  //判断是否为testNode类型
  isTextNode: function (node) {
    return node.nodeType == 3;
  },
  //判断是否是node属性中的指令
  isElementNode: function (node) {
    return node.nodeType == 1;
  },
};
这部分代码还请查看原作者的 github 传送门
接下里我们对 index 文件进行改造,使其具有 methdos 的属性,可以执行 mounted 函数
function MyVue(options) {
  var my = this;
  this.data = options.data;
  this.methods = options.methods;

  Object.keys(this.data).forEach(function (key) {
    my.proxyKeys(key); //绑定代理属性
  });

  obverve(this.data);
  // el.innerHTML = this.data[exp];
  // new Wathcher(this,exp,function(value){
  //     el.innerHTML = value;
  // })
  new Compile(options.el, this);
  options.mounted.call(this); //所有事情处理好后执行mounted函数
}
OK! 大功告成!!!! 我们测试一下吧
<!DOCTYPE html>
<html lang="en">

<head>
    <meta charset="UTF-8">
    <meta name="viewport" content="width=device-width, initial-scale=1.0">
    <title>我的数据双向绑定系统</title>
</head>

<body>
    <div id="app">
        <h1>{{title}}</h1>
        <h2>{{name}}</h2>
        <input v-mode="keywords"></input>
        <select v-mode="keywords">
            <option value="volvo">Volvo</option>
            <option value="saab">Saab</option>
            <option value="mercedes">Mercedes</option>
            <option value="audi">Audi</option>
        </select>
        <h2>{{keywords}}</h2>
        <button v-on:click="clickMe">click me!</button>
    </div>

</body>
<script src="js/Watcher.js"></script>
<script src="js/Observer.js"></script>
<script src="js/Compile.js"></script>
<script src="js/Index.js"></script>
<script>
    new MyVue({
        el: '#app',
        data: {
            title: 'Title',
            name: 'Wuriqilang',
            keywords:'myVue'
        },
        mounted(){
            window.setTimeout(() => {
                console.log('2000毫秒后,title值改变了');
                this.title = 'Compile is Working!'
            }, 2000)


            window.setTimeout(() => {
                console.log('5000毫秒后,name值改变了');
                this.name = 'you complete it!Congratulation!'
            }, 5000)
        },
        methods:{
            clickMe(){
                this.title = 'i click the button!'
            }
        }
    });
</script>

</html>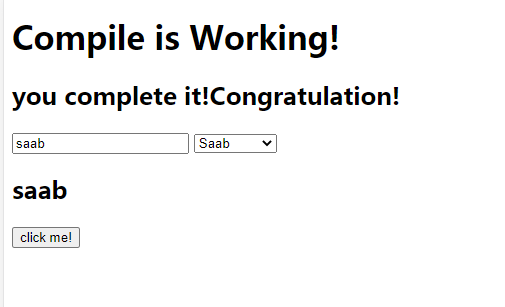
接下来,我们发挥切图仔的功力,对这个页面样式做一个简单的美化吧.
<!DOCTYPE html>
<html lang="en">
<head>
    <meta charset="UTF-8">
    <meta name="viewport" content="width=device-width,initial-scale=0, initial-scale=1.0">
    <title>我的数据双向绑定系统</title>
    <style>
        html{height:100%}
        body{
            height:100%;
            display:flex;
            justify-content : center;
            align-items : center;
        }
        #app{
            text-align: center;
        }
    </style>
</head>
<body>
    <div id="app">
        <img src="./assest/image/logo.png" alt="logo">
        <h1>{{title}}</h1>
        <h2>{{name}}</h2>
        <input v-mode="keywords"></input>
        <select v-mode="keywords">
            <option value="volvo">Volvo</option>
            <option value="saab">Saab</option>
            <option value="mercedes">Mercedes</option>
            <option value="audi">Audi</option>
        </select>
        <h2>{{keywords}}</h2>
        <button v-on:click="clickMe">click me!</button>
    </div>
</body>
<script src="js/Watcher.js"></script>
<script src="js/Observer.js"></script>
<script src="js/Compile.js"></script>
<script src="js/Index.js"></script>
<script>
    new MyVue({
        el: '#app',
        data: {
            title: 'Title',
            name: 'Wuriqilang',
            keywords:'myVue'
        },
        mounted(){
            window.setTimeout(() => {
                console.log('2000毫秒后,title值改变了');
                this.title = 'Compile is Working!'
            }, 2000)


            window.setTimeout(() => {
                console.log('5000毫秒后,name值改变了');
                this.name = 'you complete it!Congratulation!'
            }, 5000)
        },
        methods:{
            clickMe(){
                this.title = 'i click the button!'
            }
        }
    });
</script>
</html>
以下是最终效果: